Discover the art of balloon twisting with detailed PDF guides, offering step-by-step instructions for creating balloon animals like dogs, swords, and more. Perfect for beginners and experienced twisters alike, these resources provide clear visuals and easy-to-follow tutorials to master the craft.
Overview of Balloon Twisting as a Hobby
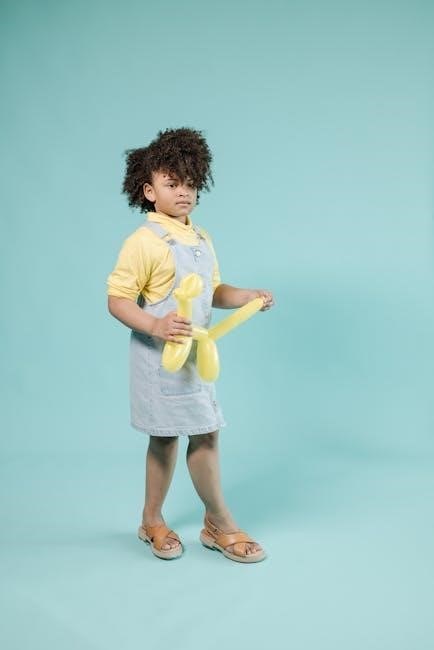
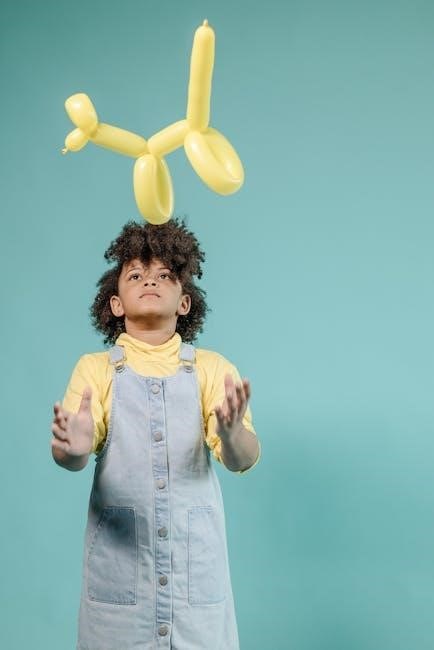
Balloon twisting is a fun and creative hobby that has gained popularity worldwide. It involves shaping balloons into various forms, from simple animals like dogs and swords to complex designs. This craft is accessible to people of all ages and skill levels, making it a great activity for both children and adults. With the help of PDF guides and step-by-step instructions, beginners can quickly learn the basics and progress to more intricate designs. Balloon twisting is not only entertaining but also a great way to develop hand-eye coordination and creativity. It’s perfect for parties, events, or simply as a relaxing pastime.
Popularity of Balloon Animals in Parties and Events
Balloon animals have become a beloved attraction at parties and events, bringing joy to both children and adults. Their universal appeal lies in their creativity and the instant delight they bring. Whether it’s a dog, sword, or giraffe, these twisted masterpieces are perfect for entertaining crowds. Balloon twisters are often in demand at celebrations, creating personalized designs that match the event’s theme. The quick production and customizable options make balloon animals a hit, ensuring memorable experiences for guests. Their popularity continues to grow, making them a staple at gatherings worldwide.
Why PDF Guides Are Ideal for Learning Balloon Twisting
PDF guides are an excellent resource for mastering balloon twisting due to their clarity and convenience. They provide step-by-step instructions with visuals, making complex designs easy to follow. Portable and accessible, PDFs allow learners to practice anywhere, anytime. High-quality images and detailed tutorials ensure that even intricate twists and folds are understandable. Additionally, PDF guides often include multiple projects, from simple balloon dogs to elaborate creations, catering to all skill levels. Their digital format makes them cost-effective and environmentally friendly, while instant downloads provide immediate access to learning materials. This makes PDF guides a popular choice for both beginners and experienced twisters.
Essential Materials and Tools
High-quality balloons, a reliable inflator, and basic tools like scissors or a pump are vital for balloon twisting. These materials ensure durability and ease of creation.
Types of Balloons Suitable for Balloon Animals
The best balloons for balloon animals are high-quality, 100% biodegradable latex balloons specifically designed for twisting. Brands like Qualatex and Conwin are highly recommended due to their durability and vibrant colors. These balloons are thicker and more elastic, making them less likely to pop during twisting. Standard sizes include 2-inch, 3-inch, and 5-inch balloons, with the 2-inch being the most common for detailed designs. Avoid generic or thin balloons, as they are more prone to breaking and difficult to shape. Proper balloon selection ensures better results and easier twisting for both beginners and experienced twisters.
How to Choose the Right Balloon Inflator
Selecting the right balloon inflator is crucial for efficient balloon twisting. Manual pumps are portable and cost-effective, ideal for small-scale use, while electric inflators offer speed and ease, perfect for frequent or large-scale creations. Dual-action pumps inflate balloons on both the up and down strokes, saving time. Consider the number of balloons you’ll use, ease of operation, and durability when choosing. For beginners, a simple manual pump is a great start, while professionals may prefer electric models for efficiency. Ensure the inflator is compatible with your balloon size for optimal performance.
Basic Tools Needed for Balloon Twisting
The essential tools for balloon twisting include high-quality balloons, a reliable inflator, and basic accessories. A good balloon inflator ensures even air distribution, preventing pops. Manual or electric pumps are popular choices, with manual being more portable. A balloon tie or knot tool helps secure twists neatly. Optional tools like a balloon sizer or measuring guide aid in maintaining consistent sizes. A clean, flat workspace is also crucial for organizing and crafting. These tools collectively streamline the twisting process, making it easier to create intricate designs and ensure durability in your balloon animals.
Basic Balloon Twisting Techniques
Mastering basic folds, twists, and knots is the foundation of balloon twisting. Proper inflation and securing techniques ensure durability and shape retention in balloon animals.
Understanding Basic Folds and Twists
Mastering basic folds and twists is essential for creating balloon animals. Techniques include mountain folds, valley folds, and bubble twists. Properly securing twists with knots ensures durability. Practice basic loops and folds to build a strong foundation. Common mistakes like over-inflating or improper twisting can be avoided with patience. Detailed PDF guides provide visual step-by-step instructions, making it easier to learn and refine these fundamental techniques. Regular practice helps develop muscle memory, allowing for smoother and more precise balloon twisting. Start with simple folds and gradually progress to more complex designs.
How to Inflate Balloons Properly
Inflating balloons correctly is crucial for balloon animal creation. Start by leaving a small uninflated portion at the end to prevent over-inflation. Use a balloon pump for consistent pressure, avoiding breath inflation. Properly inflated balloons should be firm but not taut. Over-inflated balloons are prone to popping, ruining your design. Always tie a secure knot at the end to maintain air pressure. Practice inflating to the right firmness, as this ensures easier twisting and shaping. Detailed guides in PDF formats often include visuals to help master this essential step. Proper inflation is the foundation of successful balloon twisting;
Mastering the Fundamental Balloon Knots
Mastering basic balloon knots is essential for securing twists and creating durable balloon animals. Start with the simple bubble knot, which involves folding the balloon and tying a small loop. This knot prevents air from escaping and keeps the balloon stable. Practice the fold twist and basic loop knots, as these are foundational for most designs. Step-by-step guides in PDF formats often include clear visuals to help learners perfect these knots. Regular practice builds muscle memory, making knot-tying second nature. Secure knots ensure your balloon animals hold their shape and last longer, enhancing your creations’ professionalism and appeal.
Step-by-Step Guide to Making a Balloon Dog
Learn to create a balloon dog with step-by-step guides, starting from inflating to shaping ears, body, and legs for a realistic finish.
Preparing the Balloon for the Dog Design
Begin by selecting a high-quality balloon suitable for twisting, such as Qualatex. Inflate the balloon, leaving about an inch uninflated at the end to prevent over-inflation. Tie a secure knot at the end to trap the air. Fold the balloon near the knot to create a small bubble, which serves as the foundation for the dog’s head. Adjust the balloon length to ensure adequate material for the ears, body, and legs. Avoid over-inflating, as this can cause popping. Ensure the balloon is clean and dry for better grip. This preparation sets the stage for crafting a realistic balloon dog.
Creating the Ears and Head of the Dog
Start by inflating the balloon and tying a knot at one end. To form the ears, create two small twists near the knotted end, leaving a small bubble in between. This bubble will become the dog’s face. Fold the balloon back and twist again to secure the ears in place. For the head, loop the balloon back toward the knot and twist to form a small, rounded shape. Ensure the twists are snug but not overly tight to maintain the balloon’s flexibility; Adjust the size of the ears and head for a realistic appearance. This step sets the foundation for the dog’s expressive features.
Forming the Body and Legs of the Dog
To create the body, fold the balloon back and twist it below the head to form a small loop. This loop will serve as the dog’s chest. Next, twist the balloon again to create the front legs, ensuring they are evenly sized and spaced. For the hind legs, fold the balloon back further and twist to form another loop, slightly larger than the front legs. Adjust the balloon’s remaining portion to balance the body. Ensure all twists are secure and proportional. This step brings the dog’s structure to life, with clear definition between the body and legs, preparing it for the final details.
Final Touches for a Realistic Balloon Dog
Add the finishing details to your balloon dog by shaping the ears slightly outward for a natural look. Adjust the loops to ensure the body and legs are proportional. Twist the remaining balloon to create a small tail and attach it securely to the back. Tuck any excess balloon under the body for a polished appearance. Ensure all twists are tightly secured to prevent the dog from coming apart. Make minor adjustments to the shape of the head and ears for realism. Your balloon dog is now complete, with a lifelike posture and balanced design that captures the charm of this classic balloon animal.
How to Make a Balloon Sword
Learn to craft a balloon sword by inflating a balloon, creating a basic twist near the knot, and forming the hilt and blade with precise folds and twists.
Inflating the Balloon for the Sword
Inflate the balloon to about an inch from the end, leaving a small uninflated portion to create the sword’s tip. Ensure the balloon is not over-inflated, as this can cause it to pop during twisting. Proper inflation is crucial for achieving the right shape and flexibility. Using a high-quality pump or manual inflator helps maintain consistent pressure. Avoid stretching the balloon excessively, as this may weaken its structure. Once inflated, tie a secure knot at the end to prevent air from escaping. This step sets the foundation for a sturdy and well-defined balloon sword.
Creating the Hilt and Blade of the Sword
After inflating the balloon, begin by making a basic twist about five inches from the tied end to form the hilt. This twist separates the hilt from the blade, creating a clear distinction. Next, create a series of small, tight twists along the remaining balloon to shape the blade, ensuring it is straight and even. Each twist should be spaced evenly to maintain the sword’s structural integrity. The hilt can be further defined by adding additional twists or folds for a more detailed appearance. This step requires precision to achieve a realistic and balanced sword design.
Securing the Sword Shape with Twists
Once the hilt and blade are formed, secure the shape by creating small, tight twists along the length of the blade. Start by making a twist near the hilt to form the guard, then continue with evenly spaced twists to define the blade’s edge. Ensure each twist is snug to maintain the sword’s structure. Avoid over-inflating the balloon, as this can cause it to pop. Finish by tying a knot at the end of the balloon to prevent air from escaping. Properly securing the twists ensures the sword holds its shape and looks professional.
Advanced Balloon Animal Techniques
Explore advanced balloon twisting by creating intricate designs, combining multiple balloons for larger sculptures, and adding fine details to enhance realism and complexity.
Creating Complex Shapes and Designs
Take your balloon twisting to the next level by crafting intricate shapes and designs. Use multiple balloons to create larger, more detailed animals like giraffes or elephants. Start by mastering basic folds and twists, then experiment with combining loops and bubbles to form complex structures. For a giraffe, create a long neck with stacked bubbles and add legs with simple twists. For an elephant, shape the trunk with a fold and secure it with a twist. Detailed PDF guides provide visual aids and step-by-step instructions to help you achieve these advanced designs effortlessly. Practice regularly to refine your skills and bring your creations to life.
How to Combine Multiple Balloons for Larger Animals
For creating larger animals, combining multiple balloons is essential. Start by inflating two balloons and tying them together at the ends. Twist each balloon individually to form basic shapes, then attach them at the knots. For a giraffe, use one balloon for the body and another for the neck, securing them with twists. For an elephant, combine two balloons for the body and trunk. PDF guides provide detailed instructions with visuals, ensuring each step is clear. Practice this technique to build intricate designs and impress with your balloon creations.
Adding Details to Enhance Realism
Enhance your balloon animals by adding finer details for a more realistic look. Use markers to draw eyes, mouths, and textures, bringing characters to life. For example, add pupils to a dog’s eyes or scales to a giraffe’s neck. Fold or twist small sections to create ears, tails, or other features. PDF guides often include tips for subtle details like fur texture or facial expressions. These finishing touches transform simple shapes into recognizable, lifelike creatures, impressing audiences and showcasing your creativity. Practice these techniques to elevate your balloon art and make your designs stand out.

Tips for Improving Balloon Twisting Skills
Enhance your balloon twisting skills with regular practice, following detailed PDF guides. Watch video tutorials for visual learning and join communities for inspiration and feedback.
Practicing Regularly to Build Muscle Memory
Consistent practice is key to mastering balloon twisting. Dedicate short sessions daily to develop muscle memory, focusing on basic folds and twists. Start with simple projects like balloon dogs or swords, gradually increasing complexity. Use PDF guides to follow step-by-step instructions and refine techniques. Track your progress to identify areas for improvement. Regular practice helps build dexterity and confidence, allowing you to create intricate designs effortlessly over time. Make practice a habit to enhance your skills and enjoy the creative process of balloon artistry.
Watching Video Tutorials for Visual Learning
Video tutorials provide a dynamic way to learn balloon twisting techniques. Visualizing each step helps understand complex folds and twists. Many PDF guides include links to accompanying videos, offering a comprehensive learning experience. Watching experienced artists demonstrates proper balloon handling and pacing. Pause and rewind videos to master tricky parts. This visual approach complements written instructions, making it easier to grasp intricate designs. Combine video tutorials with practice for faster skill development and a deeper understanding of balloon artistry techniques.
Joining Balloon Twisting Communities for Inspiration
Engaging with balloon twisting communities enhances creativity and motivation. Online forums and social media groups share ideas, tips, and challenges. Members inspire each other with unique designs and techniques. Collaborating with fellow enthusiasts fosters growth and innovation. Many communities offer resources, including PDF guides and video tutorials. Participating in these groups provides a supportive environment for learning and sharing balloon art. Connecting with others passionate about balloon twisting keeps the hobby exciting and rewarding, encouraging continuous improvement and exploration of new artistic possibilities.
Common Mistakes to Avoid
Over-inflating balloons, not securing twists properly, and rushing through the process are common errors. Avoid these to ensure your balloon animals hold their shape and look professional.
Over-Inflating Balloons
Over-inflating balloons is a common mistake that can lead to popping and difficulty in shaping. It’s essential to inflate balloons just enough to create the desired form without excessive pressure. Proper inflation ensures the balloon remains flexible and easier to twist. Always leave a small uninflated portion at the end to prevent bursting. Using a pump or inflator helps maintain consistent air pressure. Remember, the goal is to achieve a firm yet pliable texture that allows for smooth twists and folds without breaking. This balance is key to creating durable and professional-looking balloon animals.
Not Securing Twists Properly
Failing to secure twists properly is a common error that can cause balloon animals to unravel. Ensure each twist is tight and holds its shape. Loose twists lead to a loss of structure, making the design fall apart. To avoid this, pinch the balloon firmly after each twist and maintain consistent pressure. Practice the basic folds and knots until they become second nature. Pay extra attention to the starting knot, as it sets the foundation for the entire design. A well-secured twist ensures durability and a professional finish, keeping your balloon creations intact and visually appealing.
Rushing Through the Twisting Process
Rushing while creating balloon animals often leads to poorly formed shapes and loose twists. Take your time to ensure each fold and twist is precise and tight. Skipping steps or speeding through the process can result in misshapen designs that lack structural integrity. Patience is key to mastering balloon twisting, as each animal requires careful attention to detail. Practice regularly to build muscle memory and improve your technique. A steady, deliberate approach will yield better results and more professional-looking creations. Remember, the goal is to enjoy the process and produce high-quality balloon animals that impress and delight.
Mastering balloon animal instructions opens a world of creativity. With practice, you can progress from simple designs to intricate creations, supported by detailed PDF guides for further learning.
Final Thoughts on Balloon Animal Instructions
Balloon animal instructions provide a creative outlet for all skill levels. From simple balloon dogs to complex designs, PDF guides offer clear, step-by-step tutorials. They are perfect for beginners, allowing them to grasp fundamental techniques, while also catering to experienced twisters seeking advanced projects. These guides often include visual aids, making learning easier and more engaging. With consistent practice, anyone can master balloon twisting, transforming simple balloons into charming creations that delight audiences at parties and events. The availability of detailed PDF resources ensures that the art of balloon twisting remains accessible and enjoyable for everyone.
Encouragement to Keep Practicing and Creating
Embrace the journey of balloon twisting with enthusiasm and patience. Every twist and fold brings you closer to mastering this delightful craft. Remember, practice is key to improving your skills and unlocking new designs. Don’t be discouraged by initial challenges—each balloon animal you create is a step toward perfection. Experiment with different techniques and balloon types to expand your creativity. Share your creations with others to inspire joy and laughter. With dedication, you’ll become a skilled balloon artist, capable of crafting intricate and charming designs that captivate audiences of all ages. Keep creating and enjoying this rewarding hobby.
Resources for Further Learning
Enhance your balloon twisting skills with a variety of resources available online. PDF guides offer detailed step-by-step instructions for creating balloon animals, from simple designs like dogs and swords to complex creations. Video tutorials provide visual guidance, helping you master techniques and understand intricate folds and twists. Additionally, communities and forums dedicated to balloon art share tips, inspiration, and advanced methods. Explore these resources to deepen your understanding and expand your creative possibilities. With practice and the right guidance, you can become proficient in crafting balloon animals and continue to refine your skills over time.